studio image capture process

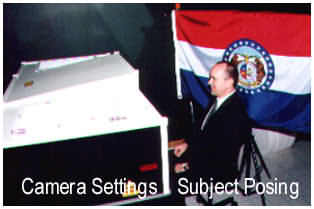
Having a commissioned hologram made is very
similar to having photographic work done in a
professional studio. First the subject is prepared
and style, posing, composition, props, etc.,
considerations are discussed between the client
and the holographer.

Next the subject is posed or arranged in front of
the camera and a master holographic plate is
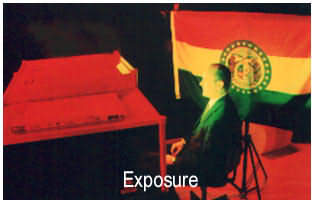
loaded. Unlike a normal photographic setting
where the photographer would take the photograph
with a camera which holds the light sensitive film,
in a holographic studio one needs to envision
the whole studio room as the camera. As such,
the holographic plates we use are sensitive only
to green light and so, prior to shooting, the room
must be darkened and illuminated only under red
light conditions.

After proper posing and scene setups and exposure
adjustments are complete the holographic plate is
loaded, the laser is triggered and the exposure is
made. This exposure to laser light takes less than 20 billionths of a second!

Normally the initial sitting just described is
completed in 1-2 hours.

Next the master holographic plate is processed and
dried. This usually takes about 1 hour. Now the master
hologram can be viewed and proofed, but only under
special laser light. This is a very dramatic experience
for most people as the master is like looking through a
window and seeing the whole room exactly as it was
at the time of exposure in TRUE 3/D! After the master
hologram has been proofed and final image planning
considerations have been discussed, the client need
not be present for the rest of the procedure.

Now the master transmission hologram must be
copied to make the white light reflection hologram
that will ultimately be displayed. This is accomplished
by inserting the master hologram in the transfer rig
and adjusting the virtual 3/D image with respect to
how it will intersect the final reflection copy being
made. With some limitations, some of the subject
can project out in front of the final hologram and
some of the subject be displayed behind the plate.

After both holographic plates are loaded and
exposure and image plane adjustments have been
set, the laser is triggered again and the final reflection
copy holographic plate is exposed.

All that is left is for the final reflection copy
holographic plate to be processed and dried. The last
step is to laminate and seal the hologram for highest quality and archival life.

The final reflection hologram can usually be completed
in a week. Your hologram is now ready to be framed
and displayed for all to see and enjoy!